Back to TheWorxHub for Senior Living Main Menu
Managing Asset Models
The Asset Models dashboard allows you add new asset models, view and create assets from existing models, and manage the approval of models that have been submitted. You can also view valuable data, like how many assets of a particular model are located at your facilities.
- Click on Assets from the navigation menu.
How to Add an Asset Model
- Click on Assets from the navigation menu and then select New Model.
- Fill out all required information on the New Model page.
How to Edit an Asset Model
You can edit information on an asset model after it has been created, which will allow you to update all assets associated with the model, if there are any.
- Use the filters across the top of the model dashboard and the search bar to locate the model you would like to edit.
- Click on the name of the model.

- Update information as needed on the General, PM Templates, Batteries, Risk Assessment, Safety Notes, Label Instructions, Alternative Equipment Maintenance, or Attachments sections.
- Be sure to click Save Changes to finalize any edits you have made. A window will appear giving you the option to update the assets associated with the model.
- Click Apply Changes to update all edited information on the associated assets.
How to View an Overview of an Asset Model
You can display an overview of the Asset Model by clicking on it from the Asset Models dashboard.
-
Use the filters across the top of the model dashboard and the search bar to locate the model you would like to view.
-
Click on the model.
-
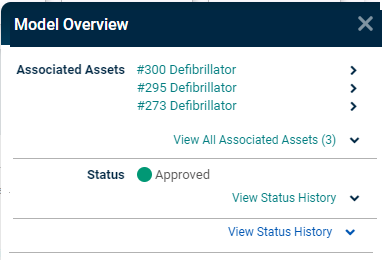
In the fly-out that opens, information will display:
-
The five most recent assets created from the model. Click View All Associated Assets to view the full asset list.
-
The current model Status. Click View Status History to view the previous status changes and any associated notes.
-
How to View Assets Associated to an Asset Model
If you need to view all assets associated with a specific model, or want to locate a particular asset created from this model, you can do so from the Asset Models dashboard.
- Use the filters across the top of the model dashboard and the search bar to locate the model whose assets you would like to view.
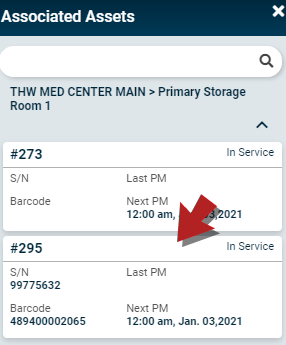
- Click More on the model, and then select View Assets. A panel will expand, listing the assets.
- You can use the search bar at the top of the panel to locate a specific asset.
- Click on the asset number to open the asset.
How to Approve an Asset Model
If you have the appropriate permissions in TheWorxHub, you can approve models that have been submitted from the Asset Models dashboard.
- Use the filters across the top of the model dashboard and the search bar to locate the model you would like to approve.
- Click Pending Approval at the top of the page if you would only like to view models awaiting approval.
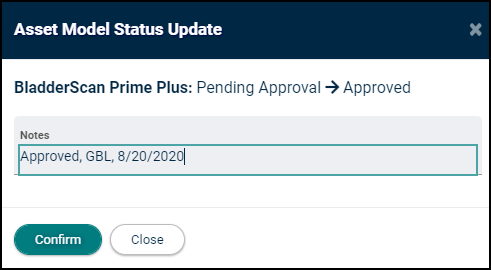
- Click Approve on the model. A confirmation window will appear.
- Enter any Notes, if needed.
- Click Confirm to finalize the approval of this model.
How to View the Status History of an Asset Model
You can view the status history of an asset model from the Model Form or from the Model Overview fly-out. The status history will display any status changes that have occurred and any associated notes.
-
Use the filters across the top of the model dashboard and the search bar to locate the model you would like to approve.
-
Click on the model title.
-
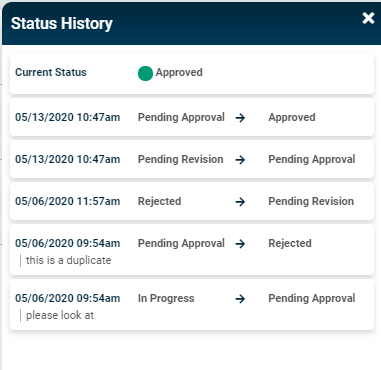
Click View status history under the model Status.
-
The Status History fly-out will appear. You can see all status changes with a time and date stamp, and any notes that were added.
How to Return an Asset Model to Service
You can return an asset model that has been retired from service to active service from the model profile. *Note: When returning an asset to service, it will need to go through the approval workflow again.
-
Use the filters across the top of the model dashboard and the search bar to locate the model you would like to return to service.
-
Click on the model title.
-
Click More and then select Return to Service.
-
In the window that appears, enter any Notes about the asset model.
-
Click Confirm.
